Sushi rice has a reputation for being tricky. Anyone who’s tried it knows the difference between good sushi rice and an average batch is night and day. It’s about balance, seasoning, and texture.
The good news is, you don’t need years of restaurant training or a specialized cooker to get it right. With an Instant Pot and the right technique, you can turn out rice that works beautifully for sushi rolls, bowls, or even simple nigiri at home.
Below, I’ll walk you through the full process in a practical way, with details that people often overlook.
We’ll cover choosing the rice, rinsing correctly, Instant Pot settings, seasoning, and troubleshooting. By the end, you’ll feel confident about making sushi rice without stress.
Instant Pot Sushi Rice
Ingredients
Equipment
Method
- Rinse and Soak the RiceRinse 2 cups short-grain rice in a large bowl with cold water. Stir gently and drain. Repeat 5–6 times until water runs mostly clear.Soak rinsed rice in clean water for 20–30 minutes, then drain completely.

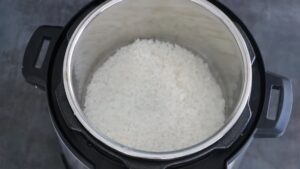
- Cook the Rice in the Instant PotAdd drained rice and 2 cups fresh water to the Instant Pot.Close the lid, set the valve to sealing, and cook on Low Pressure for 5 minutes using the Manual/Pressure Cook function.Allow a 10-minute natural release, then quick-release any remaining pressure.
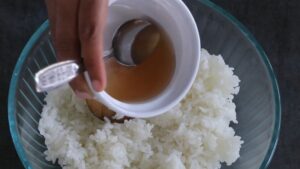
- Prepare the Sushi SeasoningIn a small saucepan, gently heat 3 tbsp rice vinegar, 2 tbsp sugar, and 1 tsp salt until the sugar dissolves (do not boil).Remove from heat and let cool slightly.

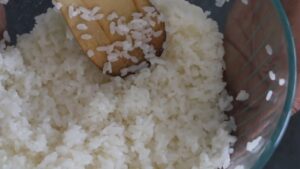
- Season the Cooked RiceTransfer hot rice to a wide, non-metal bowl.Evenly drizzle the vinegar mixture over the rice.Use a rice paddle or wooden spoon to cut and fold the rice gently - don’t stir vigorously.Fan the rice as you mix to cool it quickly and give it a glossy finish.
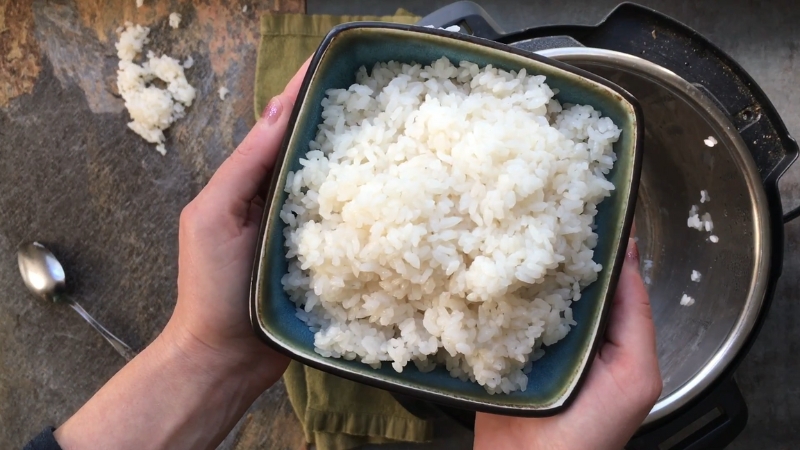
- Rest and ServeCover the seasoned rice with a slightly damp towel and let it rest for 10 minutes.Your sushi rice is now ready to use in rolls, bowls, or hand-pressed sushi!
Video
Notes
Cooking Tips
- Measure Precisely: Stick to the 1:1 rice-to-water ratio for Instant Pot cooking.
- Avoid Seasoned Vinegar: Use unseasoned vinegar for full control over flavor.
- Fan for Shine: Fanning during seasoning enhances the rice’s texture and appearance.
- Use While Warm: Sushi rice shapes best when still slightly warm.
Why the Instant Pot Works for Sushi Rice
View this post on Instagram
The Instant Pot is consistent. Traditional stovetop cooking leaves a lot of room for error with heat levels, timing, and evaporation.
A rice cooker is great, but the Instant Pot brings the same even pressure with extra control and flexibility. You set it, forget it, and get repeatable results every time.
That reliability is exactly what sushi rice needs.
Resolving Common Problems
| Problem | Likely Cause | Solution |
| Rice too mushy | Too much water or overcooking | Reduce water slightly next time (try 1 ¾ cups water per 2 cups rice) |
| Rice is too hard in the center | Not enough soaking or water | Increase soak time or add a tablespoon more water |
| Rice lacks shine | Didn’t fan while mixing | Fan during seasoning to cool quickly |
| Rice tastes too vinegary | Too much seasoning was added | Use slightly less vinegar mix or fold more gently |
Beyond the Basics
Traditional sushi rice is simple, but you can make subtle tweaks for different uses:
- Brown sushi rice: Swap half the short-grain with short-grain brown rice. Increase cooking time to 15 minutes at low pressure, with full natural release.
- Extra aroma: Add a small piece of kombu (dried kelp) to the pot before cooking. Remove after cooking.
- Healthier sweetness: Replace sugar with a teaspoon of honey or agave for a different sweetness note.
How to Store Leftover Sushi Rice
Sushi rice is best fresh, but leftovers happen. Here’s how to handle them:
- Short-term: Keep covered with a damp towel at room temperature for up to 6 hours.
- Longer storage: Refrigeration changes the texture, but you can store it in an airtight container for up to 2 days. Rewarm gently in the microwave with a damp paper towel over it to restore moisture.
- Not freezer-friendly: Freezing ruins the texture of seasoned sushi rice, so avoid it.
Practical Uses for Homemade Sushi Rice
Once you’ve mastered Instant Pot sushi rice, you’ll find it’s useful beyond sushi rolls:
- Poke bowls topped with salmon, tuna, or tofu
- Onigiri (rice balls) with fillings like pickled plum or tuna mayo
- Chirashi bowls with scattered sashimi and vegetables
- Temaki hand rolls for casual get-togethers
- Side dish for grilled fish or teriyaki chicken
Final Thoughts
@photogami Replying to @fishgull Learn how to make perfectly seasoned sushi rice with this step-by-step tutorial. And as @mrnigelng and @jar_oh_me says, wash your rice! #sushirice #sushi #rice #fyp #sushiguy #washyourrice #japanesefood #asianfood ♬ original sound – The Sushi Guy
Making sushi rice at home doesn’t need to feel intimidating. The Instant Pot gives you precision, and once you’ve nailed the rinse, soak, cook, and season process, it becomes second nature.
That same base of perfectly cooked rice can also bring balance to comfort foods like a Hawaiian plate lunch recipe, where rice ties every element together.
Your rolls will hold better, your bowls will taste balanced, and you’ll appreciate the craft behind what seems like a simple bowl of rice.
With a little practice, you’ll be making sushi rice that rivals what you’d get at a Japanese restaurant.